How to use UDK to make Tribes Maps
Starting from Scratch
This guide is aimed at people who are new to using UDK 2011.
X and Y are your horizontal axis and Z axis vertical.
Controls
Left Mouse button LMB Right Mouse button RMB Middle Mouse button MMB
| Action | Default Binding |
|---|---|
| Change Camera Angle | RMB |
| Camera Location | RMB+WASD |
| Open Content Browser | Ctrl+⇧ Shift+F |
| Select Actor | LMB |
| Actor Properties | F4 |
| Use Terrain Tool | Ctrl+RMB |
| Adjust Camera Move Speed | RMB+Scroll |
| Swap Between Move, Rotate and Scale | SpaceBar |
Want controls used outside of this guide?
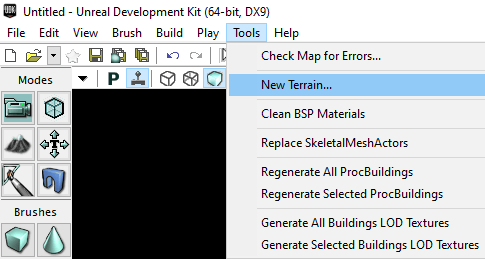
Step 1 - Create Terrain Actor
Click Tools, click new Terrain…
Location is the location of the terrain. For this guide we will leave it default.
Patches is the size of the terrain. For this guide we will put 1024 for both values.
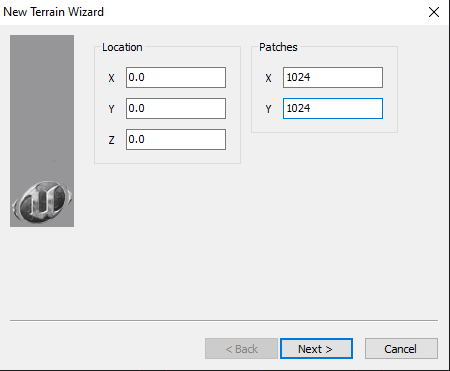
Hit finish.
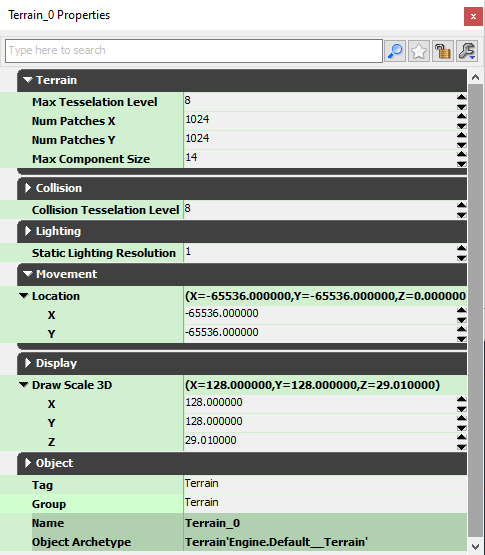
Right click the terrain and select Actor Properties F4. This can be found under View then Actor Properties.
To confirm a setting, make sure you hit enter after typing/pasting in the value.
- Set Max Tesselation Level to 8
- Set Max Component Size to 14
- Set Draw Scale 3D X = 128, Y = 128 and Z = 29.01
- Set Location X = -65536 and Y = -65536
- Set Static Lighting Resolution to 1
- Set Group to “Terrain”
Note: Setting a group to all added actors will make your life a lot easier later down the track. I group them under Blood Eagle Base, Boundaries, Buildings, Rocks, ect.
Step 2 - Save Level
Hit File then Save Current Level. Call your map TrCTF-Basic.
The naming convention matters. Tr is always required, CTF refers to the map game Mode and -Basic can be replaced with -WhateverMapNameYouDesire.
Step 3 - Add Lighting Actors
Sky Light
Let us add an actor that will light all areas of the map but not create shadows.
Open The Content Browser Ctrl+Shift+F
Under the Actor Classes Tab use the search to find SkyLight.
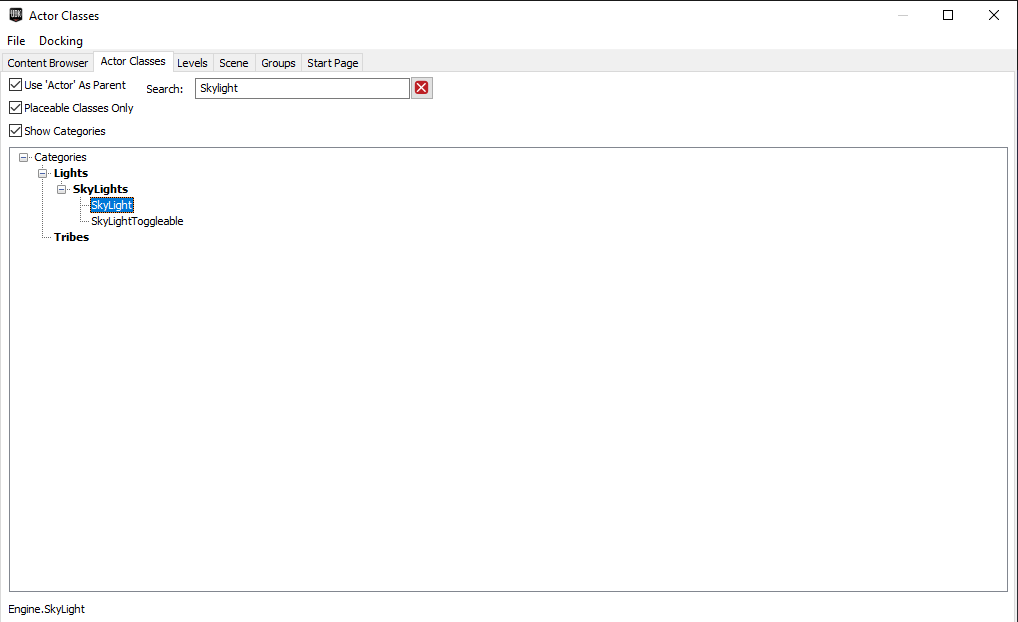
Simply drag SkyLight to your scene.
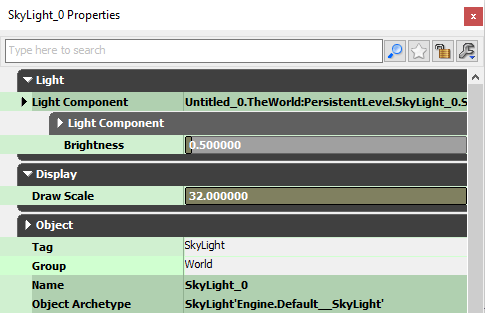
Open Actor Properties F4 for the SkyLight you just added.
- Set Draw Scale to 32
- Set Brightness to 0.5
- Set Group to “World”
Dominant Directional Light
Now let us add an actor that will act as your Sun to light the entire field and generate shadows.
Open The Content Browser Ctrl+Shift+F
Under the Actor Classes Tab use the search to find DominantDirectionalLight.
Simply drag DominantDirectionalLight to your scene.
Open Actor Properties F4 for the DominantDirectionalLight you just added.
- Set Draw Scale to 32
- Set Brightness to 0.5
- Set Group to “World”
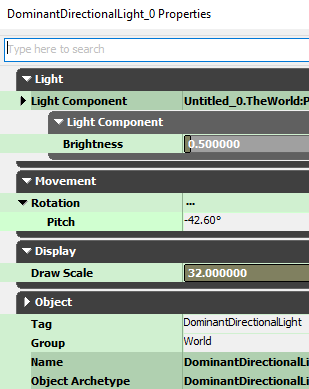
To set the direction of the light source you need to adjust the rotation. Use the Rotation Wheel Space to set the direction of your lightsource.
If you aren’t sure on how to do this you can Set Rotation Pitch to -42.60° in the Actor Properties F4.
Now that our map is lit we can start adding some TribesAscend Base Assets.
Step 4 - Add Base Assets
Blood Eagle
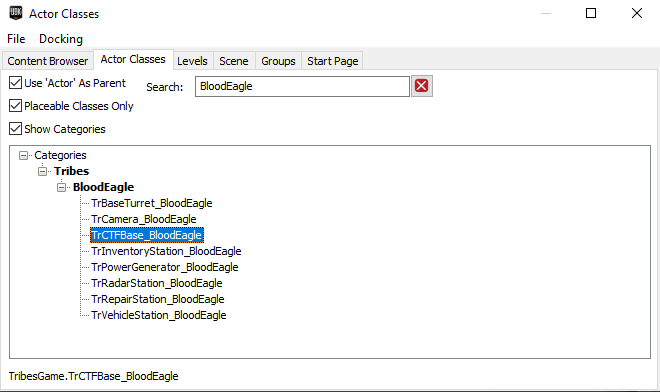
Under the Actor Classes Tab use the search “BloodEagle” to find Blood Eagle specific Actor Classes.
Blood Eagle Flag
First lets drag in TrCTFBase_BloodEagle and open our frequent friend Actor Properties F4.
- Set Location X = 17750, Y = 0 and Z = 59 for now.
- Set Group to “BloodEagle”.
Blood Eagle Generator
Next lets drag in TrPowerGenerator_BloodEagle.
- Set Location X = 18500, Y = -300 and Z = 49 for now.
- Set Group to “BloodEagle”.
Blood Eagle Radar Station
Next lets drag in TrRadarStation_BloodEagle.
- Set Location X = 19000, Y = -300 and Z = 0 for now.
- Set Group to “BloodEagle”.
Blood Eagle Inventory Station
Next lets drag in TrInventoryStation_BloodEagle.
- Set Location X = 18500, Y = 300 and Z = 46 for now.
- Set Group to “BloodEagle”.
Blood Eagle Repair Station
Next lets drag in TrRepairStation_BloodEagle
- Set Location X = 19000, Y = 300 and Z = 60 for now.
- Set Group to “BloodEagle”.
Blood Eagle Turrets
Next lets drag in TrBaSeturret_BloodEagle
- Set Location X = -17000, Y = 300 and Z = 0 for now.
- Set Group to “BloodEagle”.
Turret facing the wrong way? Set Yaw to 180.
Blood Eagle Vehicle Station
Next lets drag in TrVehicleStation_BloodEagle
- Set Location X = 18500, Y = -600 and Z = 50 for now.
- Set Group to “BloodEagle”.
We need a vehicle pad for this station. This needs to be linked up.
Next lets drag in TrVehiclePad. You will have to change your ActorClasses search for this as it wont be under BloodEagle.
- Set Location X = 19000, Y = -1200 and Z = 0 for now.
- Set Group to “BloodEagle”.
We need the name of the vehicle pad actor we just added. This is in the Actor Properties F4 under Object then the value for Name. It should be similar to “TrVehiclePad_0”.
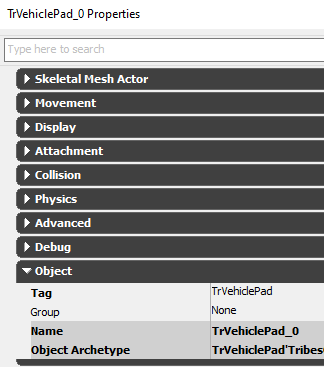
Now that we know this, we need to set our TrVehicleStation_BloodEagle m_Vehicle property to the name of our TrVehiclePad actor.
Select our TrVehicleStation_BloodEagle actor and open Actor Properties F4.
- Set m_Vehicle Pad to our TrVehiclePad actors name.

Once you hit enter the value will altar, this is normal.
Now you have setup the assets for Blood Eagle. Now for Diamond Sword!

Diamond Sword
Under the Actor Classes Tab use the search “DiamondSword” to find Diamond Sword specific Actor Classes.
This time we will do grouping a little differently. Don’t set the group property until you’re told!
Diamond Sword Flag
First lets drag in TrCTFBase_DiamondSword and open our frequent friend Actor Properties F4.
- Set Location X = -17750, Y = 0 and Z = 59 for now.
Diamond Sword Generator
Next lets drag in TrPowerGenerator_DiamondSword.
- Set Location X = -18500, Y = 300 and Z = 49 for now.
Diamond Sword Radar Station
Next lets drag in TrRadarStation_DiamondSword.
- Set Location X = -19000, Y = 300 and Z = 0 for now.
Diamond Sword Inventory Station
Next lets drag in TrInventoryStation_DiamondSword.
- Set Location X = -18500, Y = -300 and Z = 46 for now.
Diamond Sword Repair Station
Next lets drag in TrRepairStation_DiamondSword
- Set Location X = -19000, Y = -300 and Z = 160 for now.
Diamond Sword Turrets
Next lets drag in TrBaseTurret_DiamondSword
- Set Location X = -17000, Y = -300 and Z = 0 for now.
Turret facing the wrong way? Set Yaw to 180.
Diamond Sword Vehicle Station
Next lets drag in TrVehicleStation_DiamondSword
- Set Location X = -18500, Y = 600 and Z = 50 for now.
We need a vehicle pad for this station. This needs to be linked up.
Next lets drag in TrVehiclePad. You will have to change your ActorClasses search for this as it wont be under DiamondSword.
- Set Location X = -19000, Y = 1200 and Z = 0 for now. Set Group to “DiamondSword”.
We need the name of the vehicle pad actor we just added. This is in the Actor Properties F4 under Object then the value for Name. It should be similar to “TrVehiclePad_1”.
Now that we know this, we need to set our TrVehicleStation_DiamondSword m_Vehicle property to the name of our TrVehiclePad actor.
Select our TrVehicleStation_DiamondSword actor and open Actor Properties F4.
- Set m_Vehicle Pad to our TrVehiclePad actors name.
Once you hit enter to confirm it should look like this.
Diamond Sword Grouping
Now we will add the group tag a little differently.
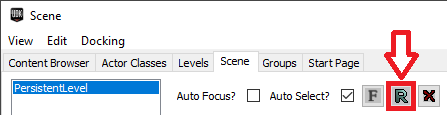
In your Content Browser, go to the Scene Tab. Hit the R Button to refresh the actors in this tab.
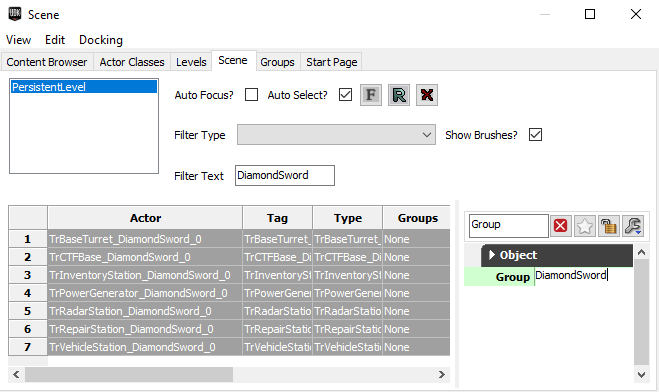
Under Filter Text type DiamondSword.
Underneath you should now see a list of all actors with DiamondSword in their details.
Select the first actor, hold shift and click the last actor.
On the right hand side you should be able to see an actor properties area.
- Set the Group value under Object to DiamondSword.
Hit the R button again to refresh the actors and you should see they are all set to DiamondSword. Clear your Filter Text and hit the R Button to refresh before leaving.
Step 5 - Add Player Spawns
Back to our Actor Classes search for UTTeamPlayerStart. Drag two of these into your map.
To set the team for your spawn you need to set the TeamNumber property of the UTTeamPlayerStart Actors to 0 or 1.
Blood Eagle is Team 0
The location for this spawn for now will be
- X = 19500
- Y = 110
- Z = 150
Diamond Sword is Team 1
The location for this spawn for now will be
- X = -19500
- Y = 110
- Z = 150
Remember to group these to their respective teams.
FAQ
Where can I find my actors?
Click View, Browser Windows, Scene. This shows a list of where all your placed actors are in the map. You can sort by Group and use the filter text to find certain items.
To select the actor in the Viewport simply double click the one you are after.
Troubleshooting
My things have disapeared!
You may have just hit
If that doesn’t work
Click View, Browser Windows, Groups. On the left column make sure everything is ticked.
Glossary
Actor
Viewport